Contact Page. Change Address and Map Coordinates
The contact page is the main way your customers communicate with you. Beautiful and welcoming image in the top should tell clients that you are open to communication. One more important thing is to declare different
Instruction how to add new page and choose 'Contact template' has been considered earlier.
Changing store address:
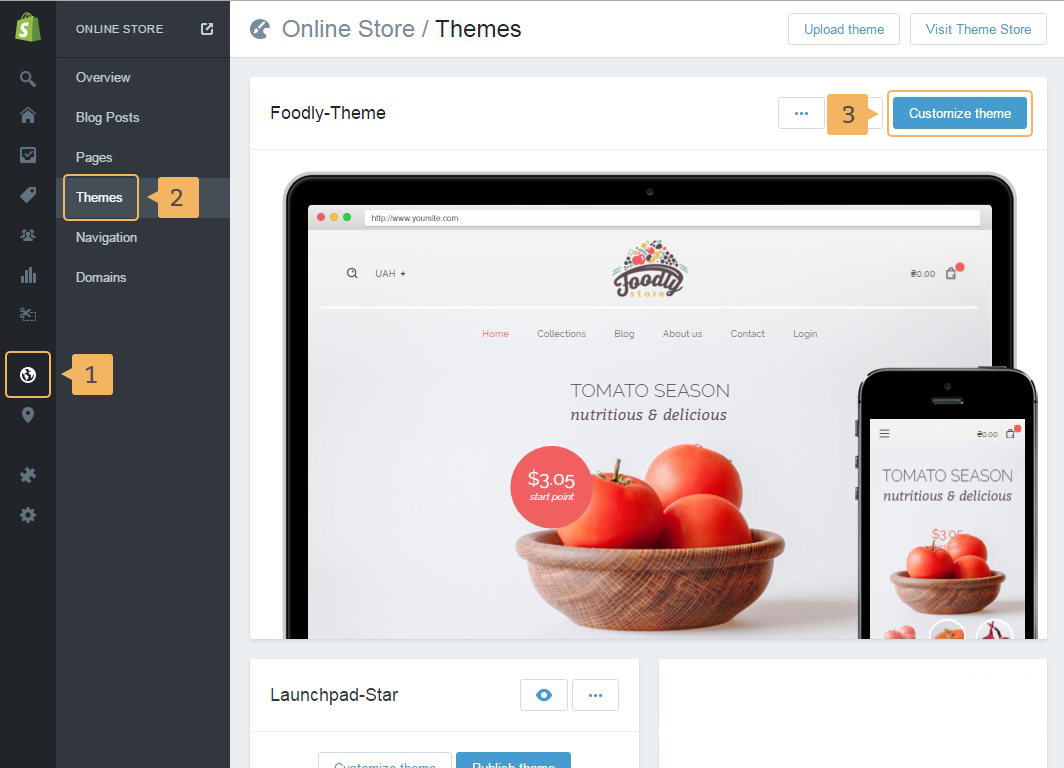
- Open theme customization page: 'Online store' (Fig. 5.5 - [ 1 ]) > 'Themes' (Fig. 5.5 - [ 2 ]) > 'Customize theme' (Fig. 5.5 - [ 3 ]).
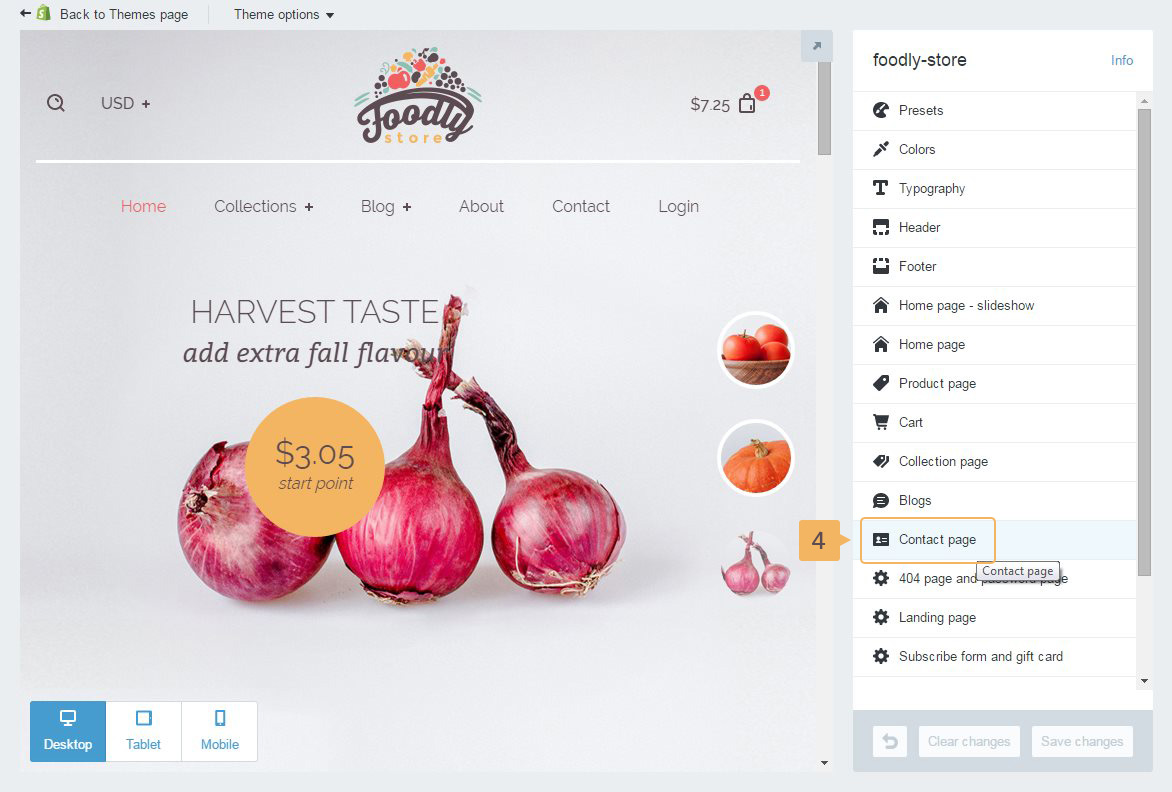
- Choose 'Contact page' (Fig. 5.6 - [ 4 ]).
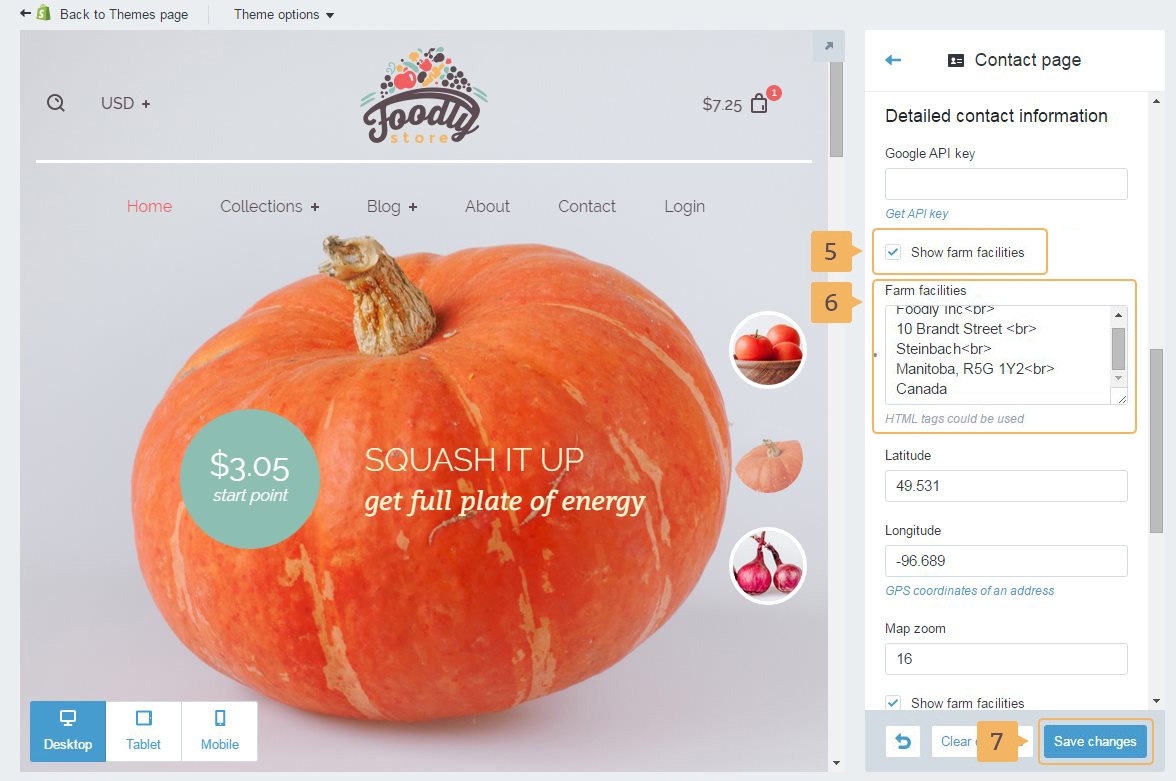
- Find section 'Detailed contact information' and enable which contacts you want to use (Fig. 5.7 - [ 5 ]).
- Type your store address into textarea (Fig. 5.7 - [ 6 ]). It allows to use HTML tags
- Save changes (Fig. 5.7 - [ 7 ])
Changing map coordinates:
- To use Google maps you need API key. Login or register in Google Developers https://developers.google.com/
- Open API library
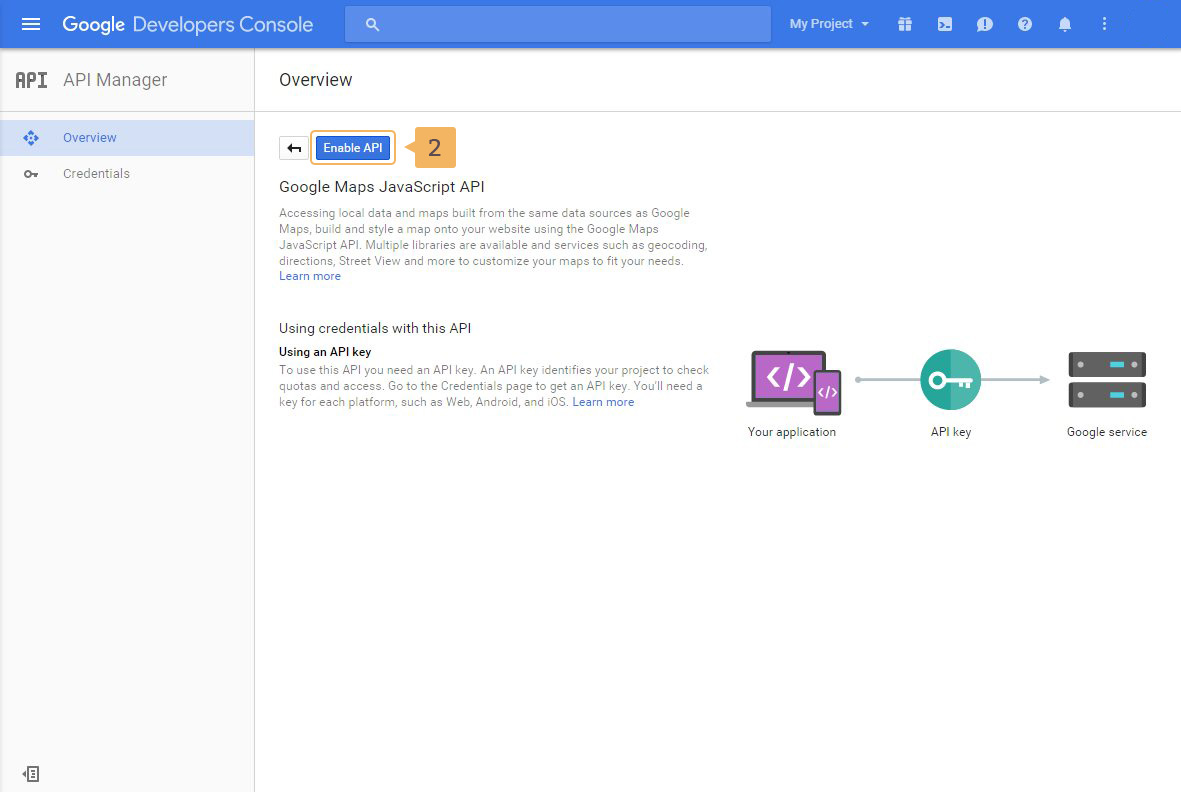
- Choose 'Google Maps JavaScript API' (Fig. 5.8 - [ 1 ])
- Enable API (Fig. 5.9 - [ 2 ])
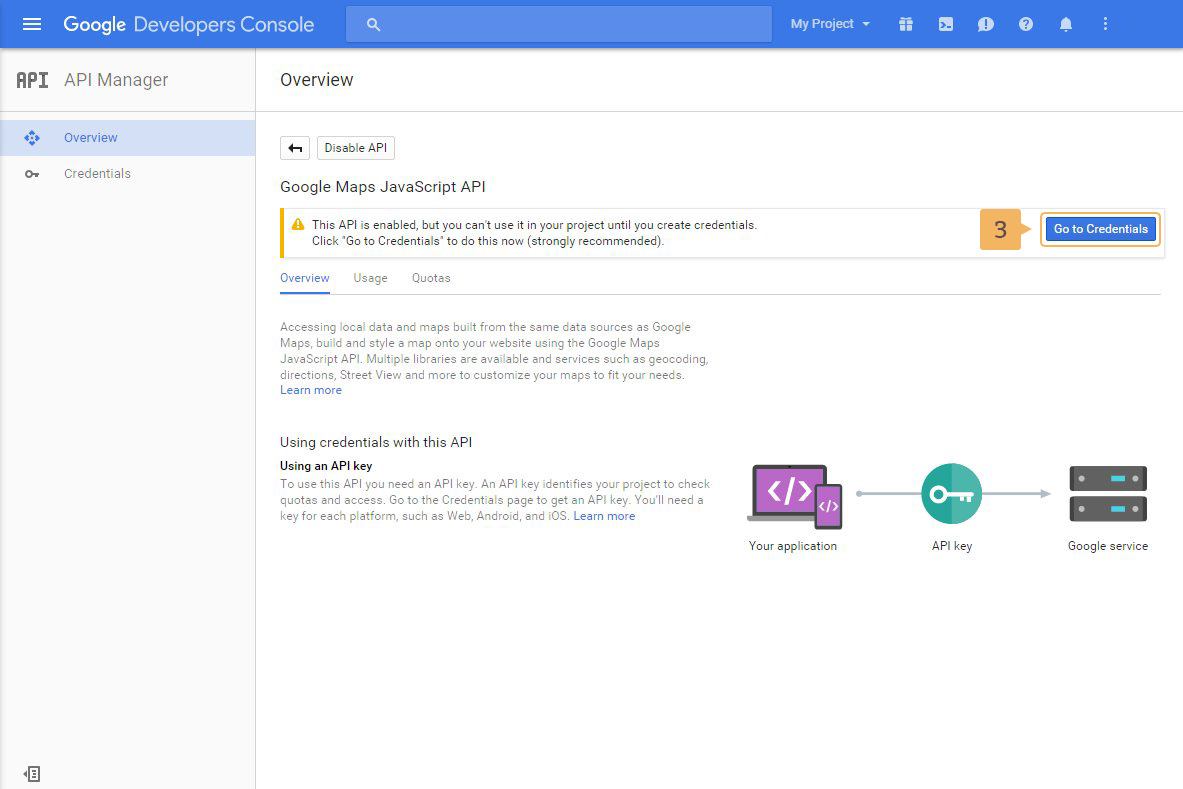
- Click 'Go to Credentials' (Fig. 5.10 - [ 3 ]) (Fig. 5.11 - [ 4 ])
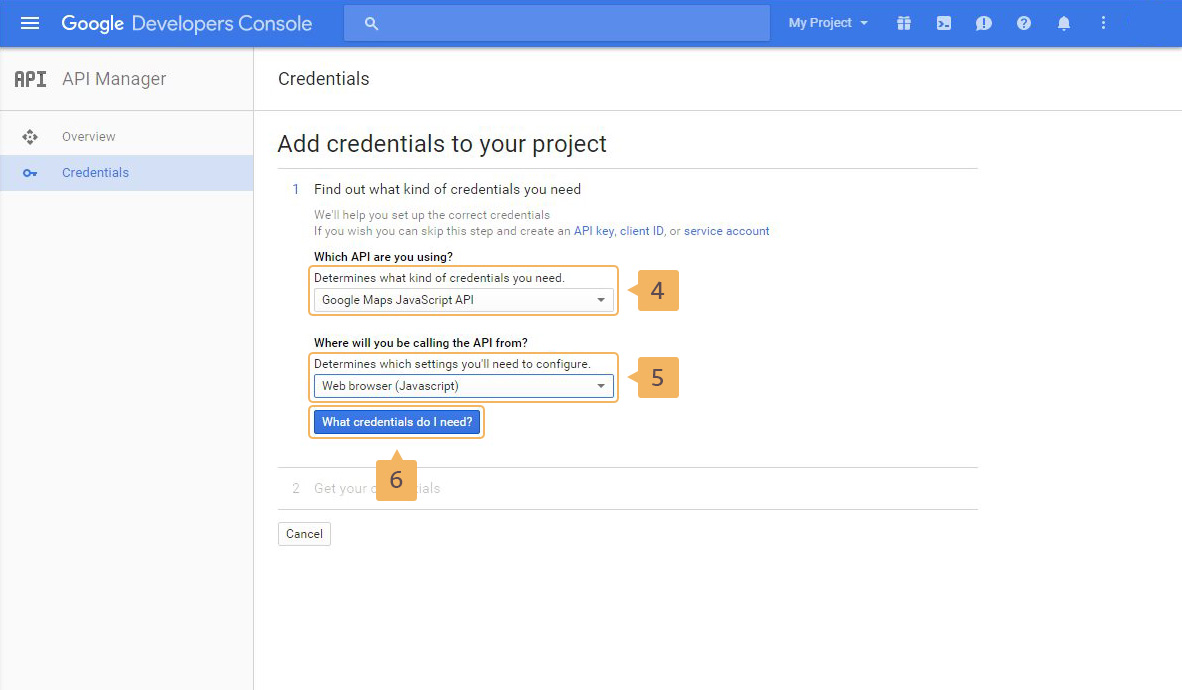
- In 'Which API are you using?' choose 'Google Maps JavaScript API'. In the second dropdown choose 'Web browser (Javascript)' (Fig. 5.11 - [ 5 ]) and click 'What credentials do I need' button (Fig. 5.11 - [ 6 ])
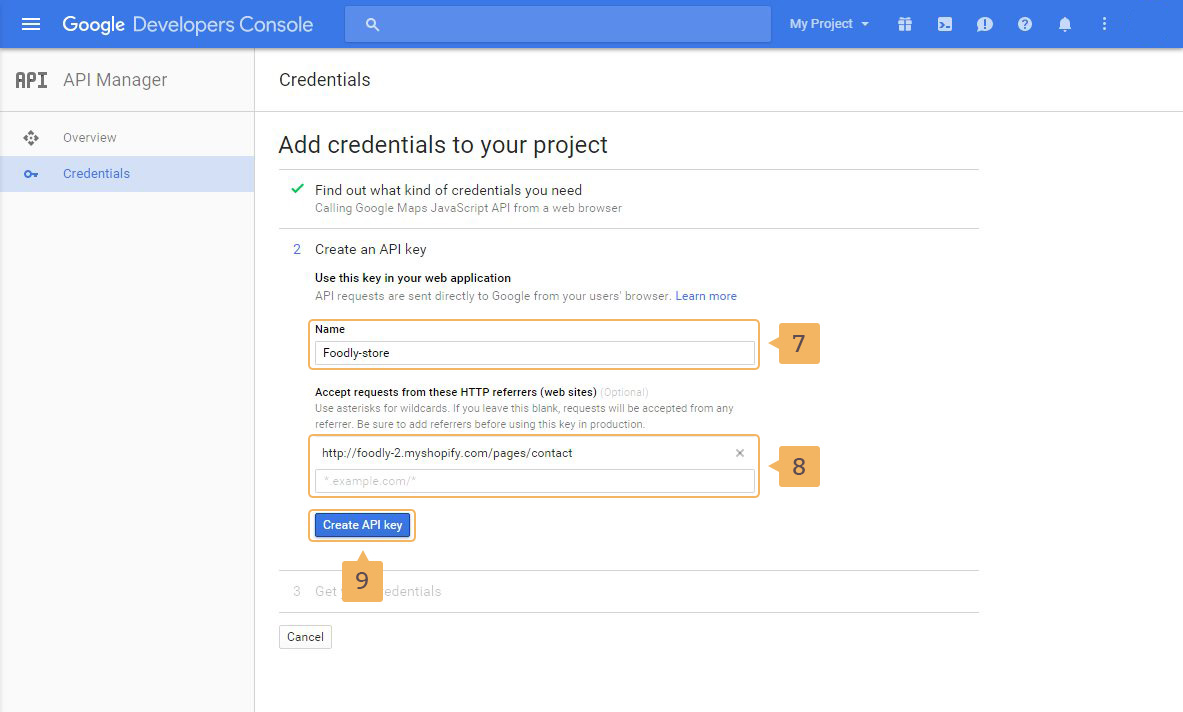
- In the next page type the API key name (Fig. 5.12 - [ 7 ]). And type the pages on which will be used google maps (Fig. 5.12 - [ 8 ]). After that click 'Create API key' button (Fig. 5.12 - [ 9 ])
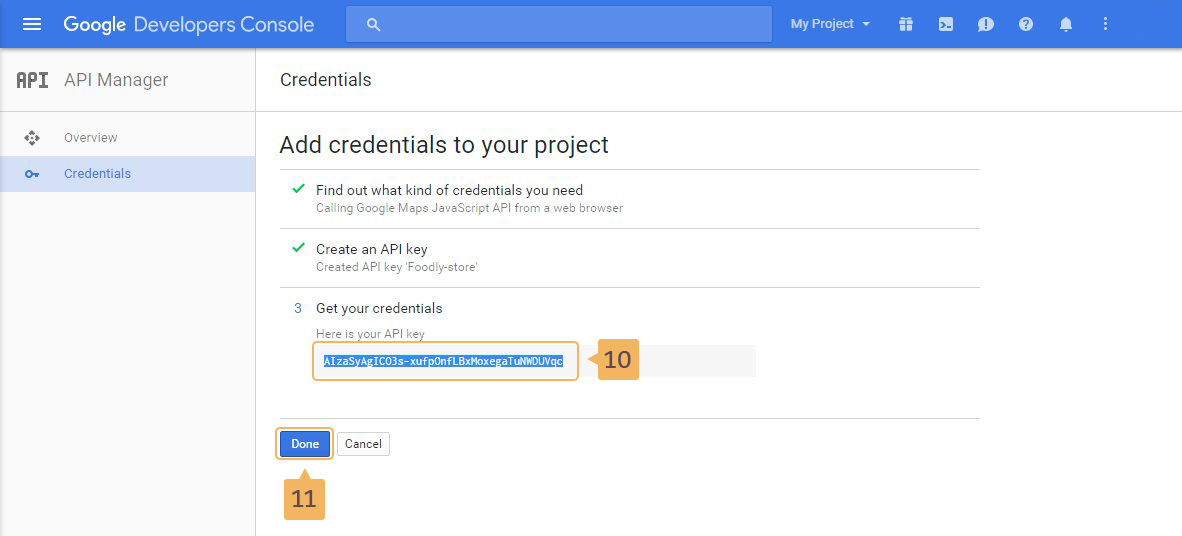
- In the next page copy your API (Fig. 5.13 - [ 10 ]). And click 'Done' button (Fig. 5.13 - [ 11 ])
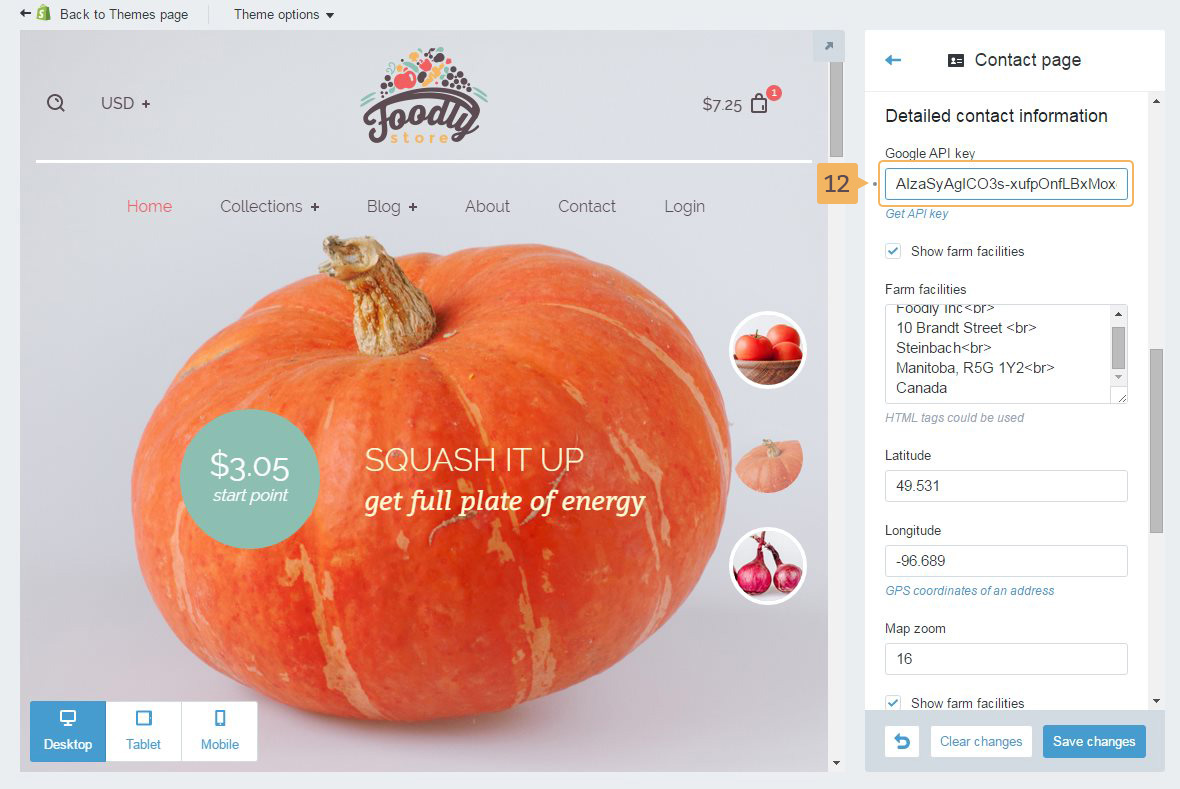
- After that return to Shopify admin and open 'Contact page' customize panel: steps [ 1 ] - [ 2 ] of previous instruction
- Find section 'Detailed contact information' and paste your API key in 'Google API key' field (Fig. 5.14 - [ 12 ])
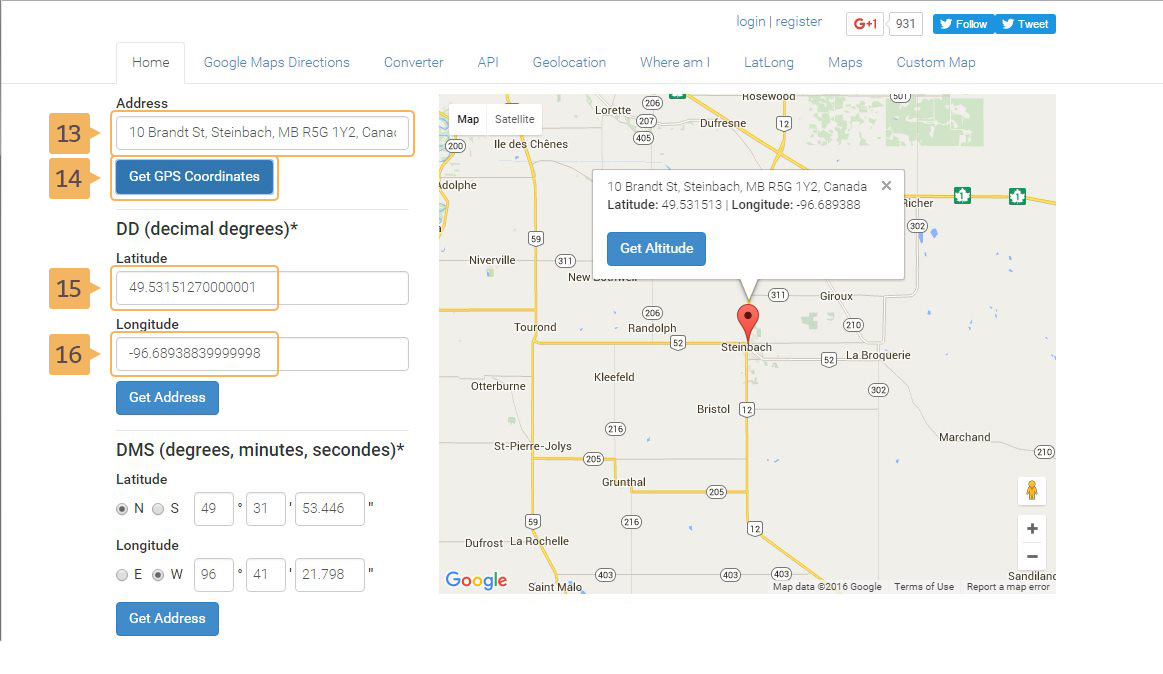
- To get latitude and longitude of your store go to http://www.gps-coordinates.net
- Type your store address in 'Address' field (Fig. 5.14 - [ 13 ]) and click 'Get GPS Coordinates' button (Fig. 5.14 - [ 14 ])
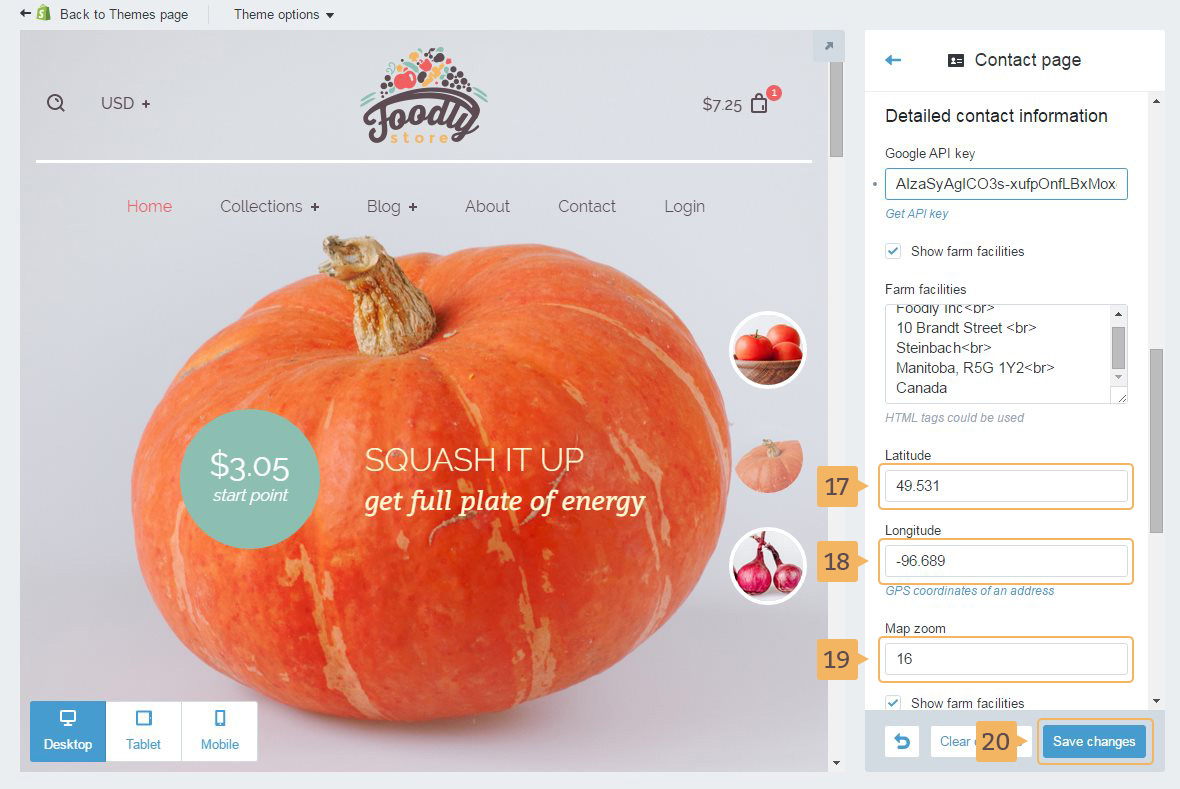
- Copy 'Latitude' (Fig. 5.14 - [ 15 ]) and paste into 'Latitude' field on 'Contact page' customize panel (Fig. 5.15 - [ 17 ]). Make the same with Longitude
- Choose map zoom (Fig. 5.15 - [ 19 ])
- Save changes (Fig. 5.15 - [ 20 ])