Dropdown Menu Creation
The next popular thing to do with main navigation is to add a submenu to its items. We will guide you through this process on 'Collections’ examples. Additional instructions of this process you may find in Shopify help guide.
Notice! Before going through the following steps you need to create a collection. Please, check our instructions how to create collection and customize it.
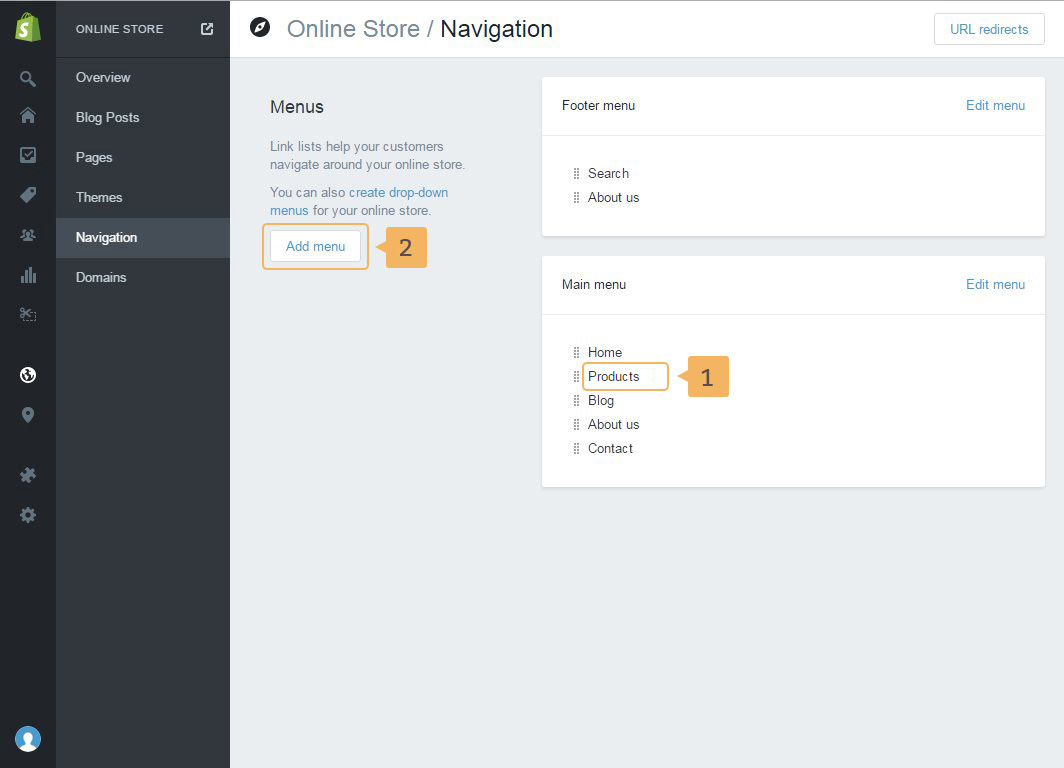
- Open navigation page in your admin panel.
- The new dropdown menu must have the same name as parent menu item. In our case it's 'Collection'' ( Fig. 2.6 - [ 1 ]).
- Click Add menu ( Fig. 2.6 - [ 2 ])
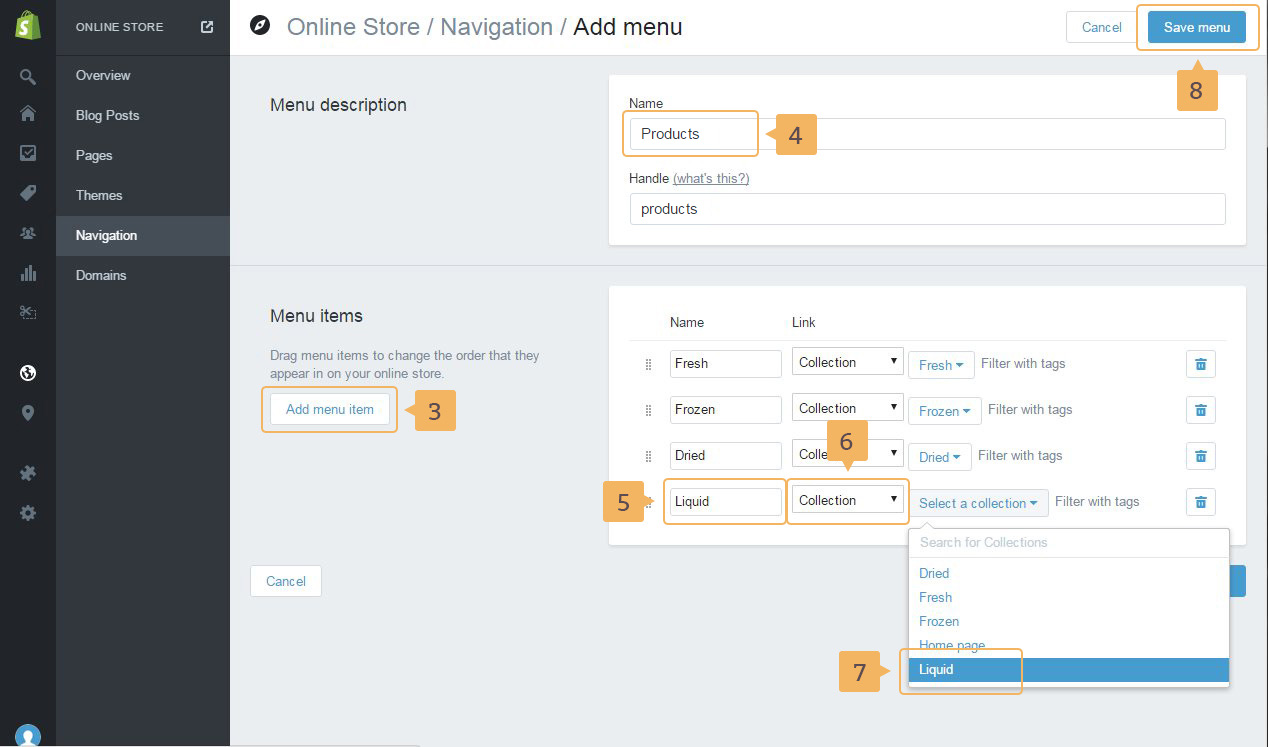
- Add new menu item by clicking "Add menu item" button ( Fig. 2.7 - [ 3 ]).
- Give a name for menu same as the parent menu item ( Fig. 2.7 - [ 4 ]).
- Enter names for your menu items ( Fig. 2.7 - [ 5 ]).
- Choose the type of link. In our case, it's 'Collections' ( Fig. 2.7 - [ 6 ]).
- Choose collection link from the list ( Fig. 2.7 - [ 7 ]).
- Save current menu ( Fig. 2.7 - [ 8 ]).
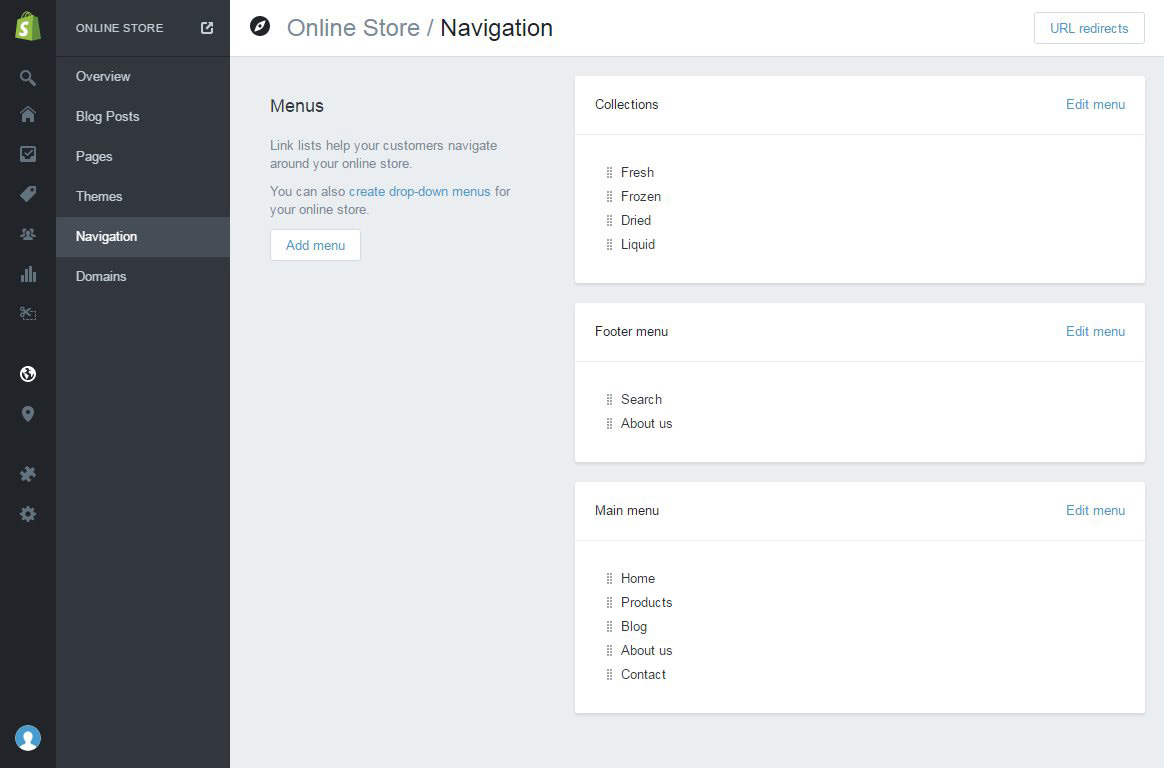
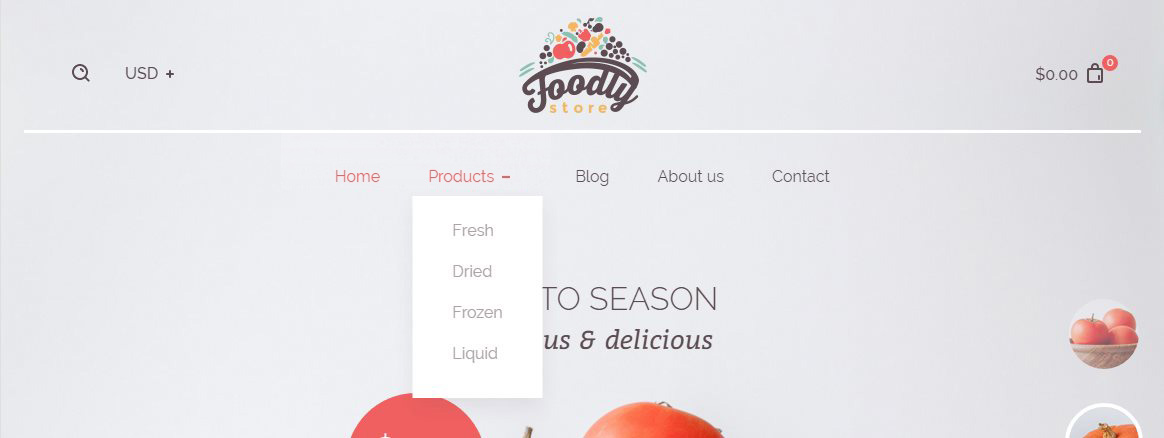
The result of your actions should be a new menu in Navigation page of the admin panel shown in Figure 2.8 and a dropdown functionality in your store's main navigation like in Figure 2.9